Tuesday, 27 May 2014

Start a business of Ice Sculpture

Start a business of Ice Sculpture 


Ice sculpting is an amazing hobby that takes an enormous amount of talent. But that talent doesn't have to just be a hobby. Take your sculpting skills and turn them into a profitable ice sculpting business.


What is Ice Sculptures ?
Ice sculpture is a form of sculpture that uses ice as the raw material. Sculptures from ice can be abstract or realistic and can be functional or purely decorative. Ice sculptures are generally associated with special or extravagant events because of their limited lifetime.

Business Overview
If you’re good with your hands and love making beautiful art, you should consider starting your own ice sculpture business and let others enjoy your work. An ice sculpture is a sculpture that uses ice as the material. Ice sculptures can be decorative or functional and are usually seen at weddings and other extravagant events due to their limited lifetime. Sculpting ice is a specialized skill but if you’re an artist who works with clay, wax or wood, you should be able to make a smooth transition to working with ice. You will need a few tools you typically won’t see in an artist’s studio such as a chainsaw, some chisels and a die grinder. Search your area for an ice house that sells ice that is clear and not cloudy. It’s important you start with clear ice so you end up with a clear sculpture. Consider working out some sort of discount deal with your ice supplier since you will be purchasing from him quite often. Business ideas like this one are only successful if the work is topnotch. So it’s important that before you try to sell your sculptures, you practice a great deal. Start with smaller blocks of ice and work your way up to large blocks. You’ll need to be familiar with what each tool does to ice and when to use each tool. Take pictures along the way so that when you’re ready to sell your first piece, you can put photos of your better sculptures in a portfolio (or on your website if you choose to have one) to show to potential clients. You’ll need to work out a delivery method to transport sculptures from your workshop to your clients’ venues. You can either purchase your own refrigerated truck or you can choose to hire a courier with a refrigerator truck to transport your ice sculptures. Make sure the transport vehicle has proper tie-downs so your sculptures are stable and make the trip safely. Market your business by talking with event planners and wedding coordinators in your area. Show them your portfolio or website and give them plenty of flyers that they can then show to their clients. Your marketing materials need to include your price structure so customers know what to expect. You could have a few pieces that you specialize set at one price and if a client wants something unusual for their event (or just something not on your list) you would charge more. You may quickly find that your ice sculptures are the talk of the town and you’ll then be able to raise your prices.
Who would possibly want to learn how to make ice sculptures? The answer is thousands of chefs and caterers. Providing you have the skills and abilities to produce ice sculptures and can teach other people, then you have overcome the first hurdle in establishing a new business venture that teaches students how to make ice sculptures. Ice sculpture classes are best suited to being marketed directly to restaurant and catering company owners by arranging a presentation appointment to display and demonstrate your service. The business does not require an operating location, as you can travel to your client's business location and teach the ice sculpting classes on-site. This is an inexpensive business to establish and there should be no problems charging clients $40 to $50 per hour for the classes.
A Day in the Life of an Ice Sculpture Business Owner:
Your day will begin with a check of any orders you need to complete that day. Depending on how quickly you sculpt, you may only be able to do one or two sculptures a day and you will need a large freezer if you plan to keep them at your workshop for very long. This means you will probably sculpt and deliver pieces in the same day. You will arrange for transport of your sculptures and stay in contact with your clients to make sure the venue is prepared for delivery. On days you are not sculpting, you will work on marketing your business.
About Your Customers:
Your customers will be event planners, brides and anyone else needing an amazing centerpiece for their elaborate event.
What You Need to Start:
  • Ice sculpting skills
  • Relationship with an ice house
  • Sculpting tools
  • Method of transporting sculptures
  • Marketing materials
  • Website (optional)
  • Computer with finance software
The Good:
  • For an artist, sculpting ice is a fun way to show your skills.
  • You can easily run this business part-time.
  • Start-up investment is relatively small.
  • You can charge top dollar for your sculptures.
  • It’s rewarding to provide beautiful ice sculptures to your clients for their events.
The Bad:

  • If you’re not already a skilled ice sculptor, you will need to spend some time honing your skills.
  • It can take some time to sell your first few pieces.

Instructions

1.   Get some tools including a chainsaw, chisels and die grinder. Experiment with other sharp objects and observe the pattern they leave on the ice. If you like one pattern more than the others, add that tool to your toolbox. 

    •  2.   Find ice. Buy only the clearest blocks with no cloudiness in the center. This means purchasing from an ice house that professionally creates blocks perfect for sculpting.
    • 3    Start small. Practice your skills on small pieces of ice and move up to bigger blocks. Become very familiar with working on ice before you try to sell your first sculpture.
  • 4    Set prices for your products. Decide how much you'll charge per ice sculpture-this usually depends on its size. Factor in your cost for the ice and other business expenses such as tool maintenance.
  • 5 Choose if and where you'll deliver which can be tricky. Don't forget that your ice sculpting company can charge a fee for delivery.
  • 6 Market your ice sculpting business. Use any of the following to get your name out there: word-of-mouth advertising, flyers, business cards, brochures or a website. All will help you gain exposure.
  • How to make ice sculptures
  • It's pretty darned easy to make fanciful, colorful ice sculptures right in your own backyard. All you need is a bunch of containers, colored water, a level surface and a good ol' cold winter.


    If you want to see past sculptures from 2008 look here and from 2009 look here. Here's a DYI on making hanging ice balloons and another DYI on regular ice balloons.Be sure to watch the video of the crackling cold ice balloons being harvested (at the end of the slide show). 


    CONTAINERS


    The fun part about making cast-ice pieces is that almost anything that will hold water can be used. Try sturdy plastic, aluminum, copper, steel containers like bundt pans, chip and salsa bowls, cake pans, mixing bowls, pie tins, jello molds, apsic molds, rubber gloves and our absolute favorite type: silicone baking molds. The silicone molds easily yield the frozen ice without any thawing. They aren't affected by the cold. What generally doesn't work are paper or cardboard containers like some nut tins and oatmeal cans. These will eventually absorb the water and blow up in a soggy puddle. Also try large molds like kiddie pools, snow sleds, snow saucers, garbage cans and lids and plastic garbage bags.

    Another characteristic of a container to avoid are ones with undercuts. Some containers have openings or ridges that extend into the inside of the can making ice removal difficult or impossible. Most containers have a little bit of "draft"  (sloped sides) making the ice removal easy. In general, avoid glass containers; the expansion of the water when it freezes will most likely crack the container - Oh my, what a mess! 

    We even like making our own containers like snipping the tops off of pop cans with scissors. This yields round cylinders of ice. Be creative and take a chance. Heck, it's just ice for pete's sake.

    PREPARATION


    Sometimes getting the ice out of a container is just a plain pain-in-the-butt. We tried using Pam cooking spray but haven't had much luck with it as a release agent. If you have a pan that may cause you anguish then spray WD-40 instead on the inside. Ice then pops out. However, this may add another pain-in-the-butt later. You'll be "welding" these pieces of ice together with a light water misting and any release agent left on the ice will be a barrier against an ice joint forming. So we don't like using any release agent at all but instead use hot water to release the ice. It's up to you! 

    You'll need a level surface. We used to use a bank of snow and mash the containers into the snow to level them out. We got smart this year and put a junky table outside and made sure the top was level in both directions.

    Lay all your pans out on the table and add, if you wish, anything you want frozen into the ice. This adds a little drama / interest to the piece. We use golf balls, forks, tinsel, shredded paper, nuts and bolts, Barbie dolls and anything that's lying around. Have fun with this! Remember, you'll get these items back in the spring when this melts.

    We've also been experimenting with wearable ice. A simple lanyard frozen into the piece can turn it into an ice necklace.

    Another trick is to embed one mold in another. The photo below right shows paper cups in a shallow round tray. After the ice freezes and the cups are removed the ice in the tray will have perfect holes cut through. Cool! Even better, you may unmold the paper cups and then place them back into the holes where they came. If different colors are used you can make fantastic ice creations.


    COLORING THE WATER


    You needn't color the water and sometimes we don't but it sure looks cool. We've experimented with a bunch of colorants. A few squirts (about 1/8 cup) of tempera paint in a 5 gallon bucket makes a bright, opaque color. Same with latex paint. Rit liquid tie-dye colorant makes a strong transparent color. We tried Kool-Aid and were disappointed at how much you had to add to get a decent color. We had to add almost the whole container of grape Kool-Aid powder into a 5 gallon bucket to make it color bright and even then it left the ice looking like dirty dishwater! Tang, the orange juice of astronauts, is a great colorant. About 1 cup of the powder in a 5 gallon bucket makes a strong color. Plus, you can lick the ice! Food coloring works so-so.


    We like to use hot water as it is less full of entrained bubbles and produces a clearer ice than cold water.

    We came across a bit of a dilemma last year as we made our ice sculptures on a local lake. We were a bit concerned about using paints in our ice as when the ice melted the paint would, of course, enter the lake. So we used food coloring in limited amounts. This year we are on land in a scrubby field so a bit of paint won't hurt.

    FILLING THE CONTAINERS


    Not much explanation needed here. Take some of the liquid into a small container to ease the pour. Here we use a graduated cylinder. Pour slowly to minimize spilling as excess water will freeze around your mold and then you'll have a stuck mold. Fill almost to the brim of the mold. Be aware that the ice will push up as it freezes.


    UNMOLDING THE ICE


    You'll have to check when the ice pieces are done. Sometimes the larger pieces look and feel completely frozen but on occasion a pocket of water remains in the center. It may not be a problem but sometimes that water dribbles out on to you. On 10 - 20 degree F nights most forms will freeze over night.

    For facts unknown, some forms release their prey far easier than others. Plastic pie tins (they really are plastic and not tin!) let go of the ice easily. Sometimes giving the form a sharp rap persuades the release. Sometimes not. In any case running hot water over the back of the form will cause it to let go. Simply hold the form up-side-down with one hand under to catch the released ice. Run hot water over the bottom and within seconds the ice should fall out. Turn the water off and replace the ice into the mold. Quickly bring the ice outside and put it onto your ice pile.

    STORING THE ICE


    We make a lot of ice for the ice sculpture ice party and need to store it outside. We lay a tarp out onto the frozen ground out of the sun and lay all the ice pieces on that. The tarp is folded over all of it. If the temperature rises above freezing you need a bit of extra protection..We shovel a good layer of snow over the tarp to insulate it. It's worked well to do so.


    MAKING YOUR SCULPTURES


    Hooray, you've successfully made a pile of colorful ice pieces! Now what? Make a sculpture! Plan out in your mind what you want to make and starting from the bottom lay one piece on the other. You can weld the two pieces together with a slight misting from a water spray bottle. If the air and ice are cold enough the two will fuse together. Hold the two ice pieces together for 30 seconds or so and they will stick together.

  • For More Watch  
  • https://www.youtube.com/watch?v=hErZ5RYx5Mk

  • Saturday, 24 May 2014

    Start a Doughnut Manufacturing Business


    Start a  Doughnut Manufacturing Business
    Introduction:-
    Simply Doughnuts is a small, independent  British manufacturer. We are based in Blackburn in Lancashire and we have  a passion for innovative, great-tasting food. a small fried cake of sweetened dough, typically in the shape of a ball or ring. A ring-shaped object, in particular a vacuum chamber in some types of particle accelerator.

    An Expert Doughnut Manufacturer
    As you’ll see on our Products page and online Catalogue, we manufacture doughnuts in a broad range of flavours and in three different sizes. Whether it’s a filled jam doughnut or a chocolate covered ring, you can be sure that every product will be fresh, tasty and long-lasting.

    However, besides the usual family favourites, we can produce doughnuts of almost any kind and to your own design and specification. We can also produce doughnuts that are gluten-free or suitable for the vegetarian or halal markets.

    Fundamentally, we offer two long-life doughnut recipes – one based on a traditional cake doughnut mix and another that is yeast-raised.  Both offer great flavour and extended shelf-life and you can buy both of them in our online store.

    Demand

    If you have ever witnessed an auction, then you might have noticed that there are many more low bids for an item than high bids. That is, people are more willing and able to pay a low price for an item than to pay a high price. This willingness and ability to buy something is referred to as demand. The fact that more people are willing to buy at lower prices than at higher prices is called the law of demand.

    Principles of Good Doughnut Production

    Cake doughnuts are unique among all bakery products since they are produced by depositing a fluid batter directly into a very hot, fluid frying medium. The final shape of the doughnut is in no way controlled by any external influence but determined by the formula, precise scaling of ingredients, consistent ingredient quality, frying fat quality, and effective process controls. Adequate control of all these parameters is probably more critical for cake doughnuts than for any other product produced in the bakery. 
    Controls are equally important with yeast-raised doughnuts where factors such as yeast quantity, dough temperature, mixing time, floor time and proving time affect final doughnut quality.  
     Important factors in making good doughnuts
    1. Good prepared mixes   
    Select a mix from a reputable manufacturer and select one of good quality.
    2. Correct water levels   
    It is important to observe the correct quantity of water added to the mix to get the proper dough consistency. If the dough has too much water, the doughnuts appear distorted, produce large holes, and absorb more oil. If the dough is too stiff, it results in thick crust, rough, broken surface on one side and excessive absorption of oil in cracks.
    3. Proper dough handling and mixing   
    Mixing times depend on the richness of the dough, type of flour, and temperature of the dough. An undermixed dough will result in excessive absorption, coarse texture and irregular shape. An overmixed dough will produce doughnuts with large holes, tight grain and texture, excessive absorption, and a knobby irregular surface.
    4. Proper makeup before frying  
    -Cake doughnuts   
    After adding the right amount of water and correct mixing, the batter (recommended dough temperature 24 °C) should be given a rest period (floor time) of 10-15 min before cutting out into fryer.  The rest period allows the batter to continue to hydrate and the leavening to continue aerating the batter]  
    -Yeast-raised doughnuts   
    Dissolve the yeast in the water, combine all dry ingredients together (including the shortening), gradually add water while mixing at medium speed.
    It is important to observe the optimum dough temperature (28 °C). Give the dough 10 mins floor time.
    Knock back dough and portion and cut dough into approximately 2 kg pieces. Shape into round balls until soft and a smooth surface is achieved, to eliminate air pockets and develop a uniform tension in the dough. Cover with a dry cloth for intermediate proofing (ambient conditions, 15-20 mins). This particular step varies with the type of mix used, for example, when using “no-time” (fermentation eliminated) yeast-raised donut mix. Refer to your supplier for directions.     
          - Rolling/sheeting and cutting yeast-raised doughnuts  
    Dough is rolled out by hand or fed into a series of sheeters to reduce thickness. The doughnuts can be extruded by air pressure or by a vacuum-extrusion system and then deposited onto automatic proofer trays (eliminating manual handling, common for automated donut production systems), cut out by cutters over the sheet of dough, or cut out by hand.
        -  Proofing yeast-raised doughnuts   

    The doughnuts should be proofed a little on the “young” side. Twenty minutes is usually sufficient proofing time. Overproofed doughnuts are poor in appearance, lack full flavour, and show increased fat absorption during frying.
    Proof box should be 35 °C to 37.8 °C, with sufficient humidity to prevent crusting. When touched, a properly proofed donut will hold an indentation without collapsing. If the indentation returns to the surface, the donut is underproofed. If the donut collapses when touched, it is overproofed.
    5. Proper frying   
    Cake doughnuts   

    Cake doughnut batter is pushed through a handheld or a mechanical depositor, where the doughnut shape is produced by the type of plunger or attachment used. Plunger shapes can be plain, star, french cruller, krinkle, old-fashioned, ball, stick, or if using attachments, crescent or dunkerrete. 
    Set the fryer to 190°C with clean frying oil and a frying depth of 5 to 8cm. Fill the depositor with batter and check the drop weight. An average weight is 40g per drop. Transfer batter to machine or hand dropper and drop from 2.5 to 4cm into frying oil at 190°C. Allow donuts to rise to the surface of the oil for 30 – 40 seconds and flip over for another 30 – 40 seconds.
    Frying at lower temperatures does not seal the surface rapidly enough, and excessive absorption results. Temperatures above those levels prevent proper expansion and may produce soggy interiors. 

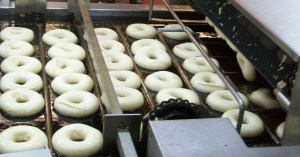
    Doughnut batter in depositor

    6. Proper care of shortening   
    Particles that accumulate in the fryer should be removed otherwise the oil will smoke, and can also result in excessive colour darkening, oxidation and development of free fatty acids.


    7. Proper finishing   
    Cake doughnuts   
    Transfer the cooked donuts to a draining tray and allow to drain for a minute or two before rolling in cinnamon sugar. Allow to cool further if applying icing or other decoration  
    Yeast-raised doughnuts should be glazed hot, immediately out of the fryer. The doughnuts are conveyed through the glaze at about 38°C. Using wire screens, the doughnuts go through the glaze and held on the screens until the glaze drains and sets up.

    International Market  Position -   This position will successfully meet these objectives by partnering with local country franchisee marketing/operations teams in analyzing local marketplace/business/consumer trends, developing annual and long-range marketing plans, developing new market/store opening plans, developing product innovation plans and ensuring execution of all marketing programs adhere to Krispy Kreme brand standards.  The International Marketing Manager: Latin America plays a key role in championing local market needs, driving support of those needs from the broader Krispy Kreme organization and delivering business-building solutions to address those needs.  This position works with the Senior Director – International Marketing and Krispy Kreme International team management to develop/grow the capabilities of the local marketing team and continue to develop and grow the Krispy Kreme brand in the Latin America market.

    For more details:-
    http://www.netplaces.com/economics/supply-and-demand/demand.htm

    http://rvoshare.wordpress.com/2010/07/28/doughnut-production/ 

    Start a Eco Friendly Toys Business

    Start a  Eco Friendly Toys Business
    ‘Eco' is an abbreviation of the word ecology which means the relationship between organisms and their habitats or humans and their homes in the global logic or sense. 'Eco-friendly' refers to a friendly relation between humans and their surroundings. In other terms, humans taking good care of the environment in which they live. Environmentally friendly (eco-friendly) refers to goods and services considered to inflict minimal or no harm on the environment.

    Demands:-
    Green Lifestyles - Eco-Friendly Toys in High Demand this Holiday Season parents will find a growing selection of green toys available in today's market.With the holidays in full swing, most of us are already planning the details of our holiday decorating, entertainment, and gift giving. When it comes to picking out gifts for children however, parents who prefer more Eco-friendly play products often struggle with finding quality made toys. However, now, more then ever before, parents will find a growing selection of green toys available in today’s market.

    Types of Eco Friendly Toys:
    1.Crochet Toys:-
    Crochet is a hobby that provides practitioners hours of relaxation and creative enjoyment. You can turn this hobby into a money-making venture, as well. Start-up costs for a crochet business are reasonable, but you need to know what sells and make a commitment to producing your crochet items quickly. Finding a wholesale supplier can help maximize your profits, as well.

    Things to note:
    ·         This item is crocheted in the round. Do not join rounds. Use a scrap of different colored yarn to mark the rounds.
    ·         Work in loose ends as you crochet along or thread the end of yarn through a needle and weave it into the other stitches.
    ·         Amigurumi (lit. Knitted stuffed toy)  is characterized by its tight crochet that can hold beads and stuffing materials easily. This is achieved several ways, but the most common is to use a smaller crochet hook and pull the yarn taut with each "stitch".
    ·       

    Homemade Baby Toys to Crochet
    Babies are always so much fun to shop for. All of my friends are either expecting their first little one, or have just welcomed a newborn into the world. Buying gifts for these new moms and their little bundles of joy, however, can add up and take a toll on your pocketbook. The best solution to this problem is to make your own baby toys.
    There are so many great homemade baby toys to crochet on AllFreeCrochet. We have patterns for baby boys, baby girls, and even the parents. Choose from stuffed animal baby toys, educational baby toys, and home decor baby toys. Whatever you choose, you're sure to have the most special and cherished gift at the next baby shower you attend. Both mom and baby will treasure your homemade gift for years and years to come. For even more insanely cute crochet patterns.

    Stuffed Animal Baby Toys
    Huggable Teddy ToyThese soft and cozy stuffed animals are perfect for babies to cuddle and snuggle with. Babies are sure to carry these adorable animals with them wherever they go. Kids loving playing house with their stuffed animals. As they get older, these stuffed animals will become a part of your child's life.

    Soft Baby Rattle
    Educational Baby Toys
    Babies begin to develop and learn at a very young age. These homemade crocheted baby toys to crochet will help stimulate the mind and develop skills as he/she grows. Each one of these educational baby toys is intended to help develop your baby's learning skills while also providing hours of fun. 


    Giraffe Pillow


    Home Decor Baby Toys
    These free crochet baby toys were designed for both babies and parents. Having baby toys scattered throughout the house can be a nightmare, so keep them organized with any one of these homemade organizers. These homemade baby toys to crochet will look great anywhere in your house. 


    2.Wooden Toys-
    Wood toys are very popular green toys. Puzzles, dolls, and other playthings can be made from wood that is easily renewable and therefore green. Some of these are made from wood that would otherwise be discarded, like rubberwood. Bamboo is extremely popular for green toys and can be made into objects of many different shapes and sizes.

    2.Organic Cotton Toys-
    Organic fabrics, like organic cotton, are often used to make children's playthings that are not only green but also less likely to contain harmful chemicals. Dolls, soft toys, and other objects can all make use of organic fabrics. These usually considered environmentally friendly not because they use up fewer resources than other materials, but because they use fewer chemicals.
    Recycling is almost always considered environmentally friendly, but it must be done very carefully in order to make toys that are safe for children. Reusing glass, plastic, and other materials can be a good way to make products that must contain certain materials more environmentally friendly. Some of the greenest toys are not recycled but simply made to last for generations. Reducing waste, reusing items, and repairing toys when possible are all good strategies to prevent additional resources from being used.
    Some people have additional standards for green toys that reduce environmental impact. Packaging, for example, must be minimal and, when possible, reusable. Many people maintain that in order to be maximally environmentally friendly, a toy must be made locally from local materials, because this cuts down on transportation costs. Looking at the total environmental cost of making the product is important when thinking about whether it is green. Just because a toy is marketed as environmentally friendly does not mean that the producers believe in the same standards of environmental protection as consumers.


    International Market Potential :-
    Despite consumers being thriftier with their disposable incomes due to the continuous rise in the cost of living over the review period, toys and games continued to achieve growth in 2012. Within traditional toys and games, action figures and accessories, construction toys and dolls and accessories registered strong performances. The demand for toys has undergone a dramatic change. The concept of "edutainment" toys has emerged. Toys no longer just fulfill the entertainment requirements of a child, but also cater to the growing needs of skill development of children. Through technology, toys are being made more educational and engaging. The global toy market is characterized by licensing agreements between the companies, offering innovated.

    For more details:-
    http://www.wikihow.com/Crochet-an-Amigurumi-Toy
    http://www.allfreecrochet.com/Baby-Toys/Homemade-Baby-Toys-to-Crochet

    START A BUSINESS OF HERBAL LASSI

    START A BUSINESS OF HERBAL LASSI INTRODUCTION Lassi, as such has very good nutritional value. Lassi is considered to be even b...