Start a business of Ice Sculpture


Ice sculpting is an amazing hobby that takes an enormous amount of talent. But that talent doesn't have to just be a hobby. Take your sculpting skills and turn them into a profitable ice sculpting business.
What is Ice Sculptures ?
Business Overview
4 Set prices for your products. Decide how much you'll charge per ice sculpture-this usually depends on its size. Factor in your cost for the ice and other business expenses such as tool maintenance.
5 Choose if and where you'll deliver which can be tricky. Don't forget that your ice sculpting company can charge a fee for delivery.
6 Market your ice sculpting business. Use any of the following to get your name out there: word-of-mouth advertising, flyers, business cards, brochures or a website. All will help you gain exposure.


For More Watch
https://www.youtube.com/watch?v=hErZ5RYx5Mk

Ice sculpting is an amazing hobby that takes an enormous amount of talent. But that talent doesn't have to just be a hobby. Take your sculpting skills and turn them into a profitable ice sculpting business.
What is Ice Sculptures ?
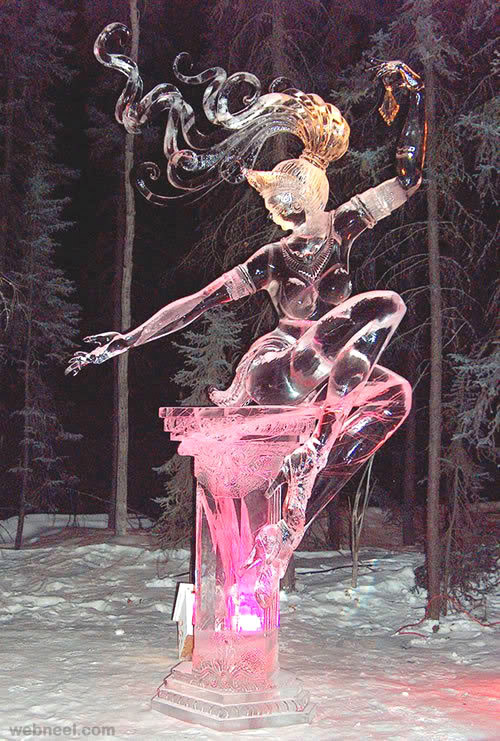
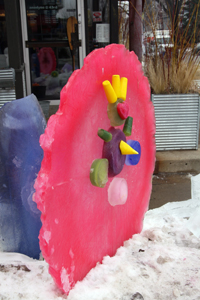
Ice sculpture is a form of sculpture that uses ice as the raw material. Sculptures from ice can be abstract or realistic and can be functional or purely decorative. Ice sculptures are generally associated with special or extravagant events because of their limited lifetime.
Business Overview
If you’re good with your hands and love making beautiful art, you should consider starting your own ice sculpture business and let others enjoy your work. An ice sculpture is a sculpture that uses ice as the material. Ice sculptures can be decorative or functional and are usually seen at weddings and other extravagant events due to their limited lifetime. Sculpting ice is a specialized skill but if you’re an artist who works with clay, wax or wood, you should be able to make a smooth transition to working with ice. You will need a few tools you typically won’t see in an artist’s studio such as a chainsaw, some chisels and a die grinder. Search your area for an ice house that sells ice that is clear and not cloudy. It’s important you start with clear ice so you end up with a clear sculpture. Consider working out some sort of discount deal with your ice supplier since you will be purchasing from him quite often. Business ideas like this one are only successful if the work is topnotch. So it’s important that before you try to sell your sculptures, you practice a great deal. Start with smaller blocks of ice and work your way up to large blocks. You’ll need to be familiar with what each tool does to ice and when to use each tool. Take pictures along the way so that when you’re ready to sell your first piece, you can put photos of your better sculptures in a portfolio (or on your website if you choose to have one) to show to potential clients. You’ll need to work out a delivery method to transport sculptures from your workshop to your clients’ venues. You can either purchase your own refrigerated truck or you can choose to hire a courier with a refrigerator truck to transport your ice sculptures. Make sure the transport vehicle has proper tie-downs so your sculptures are stable and make the trip safely. Market your business by talking with event planners and wedding coordinators in your area. Show them your portfolio or website and give them plenty of flyers that they can then show to their clients. Your marketing materials need to include your price structure so customers know what to expect. You could have a few pieces that you specialize set at one price and if a client wants something unusual for their event (or just something not on your list) you would charge more. You may quickly find that your ice sculptures are the talk of the town and you’ll then be able to raise your prices.
Who would possibly want to learn how to make ice sculptures? The answer is thousands of chefs and caterers. Providing you have the skills and abilities to produce ice sculptures and can teach other people, then you have overcome the first hurdle in establishing a new business venture that teaches students how to make ice sculptures. Ice sculpture classes are best suited to being marketed directly to restaurant and catering company owners by arranging a presentation appointment to display and demonstrate your service. The business does not require an operating location, as you can travel to your client's business location and teach the ice sculpting classes on-site. This is an inexpensive business to establish and there should be no problems charging clients $40 to $50 per hour for the classes.
A Day in the Life of an Ice Sculpture Business Owner:
Your day will begin with a check of any orders you need to complete that day. Depending on how quickly you sculpt, you may only be able to do one or two sculptures a day and you will need a large freezer if you plan to keep them at your workshop for very long. This means you will probably sculpt and deliver pieces in the same day. You will arrange for transport of your sculptures and stay in contact with your clients to make sure the venue is prepared for delivery. On days you are not sculpting, you will work on marketing your business.
About Your Customers:
Your customers will be event planners, brides and anyone else needing an amazing centerpiece for their elaborate event.
What You Need to Start:
- Ice sculpting skills
- Relationship with an ice house
- Sculpting tools
- Method of transporting sculptures
- Marketing materials
- Website (optional)
- Computer with finance software
The Good:
- For an artist, sculpting ice is a fun way to show your skills.
- You can easily run this business part-time.
- Start-up investment is relatively small.
- You can charge top dollar for your sculptures.
- It’s rewarding to provide beautiful ice sculptures to your clients for their events.
The Bad:
- If you’re not already a skilled ice sculptor, you will need to spend some time honing your skills.
- It can take some time to sell your first few pieces.
Instructions
1. Get some tools including a chainsaw, chisels and die grinder. Experiment with other sharp objects and observe the pattern they leave on the ice. If you like one pattern more than the others, add that tool to your toolbox.
- 2. Find ice. Buy only the clearest blocks with no cloudiness in the center. This means purchasing from an ice house that professionally creates blocks perfect for sculpting.
- 3 Start small. Practice your skills on small pieces of ice and move up to bigger blocks. Become very familiar with working on ice before you try to sell your first sculpture.
How to make ice sculptures
It's pretty darned easy to make fanciful, colorful ice sculptures right in your own backyard. All you need is a bunch of containers, colored water, a level surface and a good ol' cold winter.
If you want to see past sculptures from 2008 look here and from 2009 look here. Here's a DYI on making hanging ice balloons and another DYI on regular ice balloons.Be sure to watch the video of the crackling cold ice balloons being harvested (at the end of the slide show).
CONTAINERS
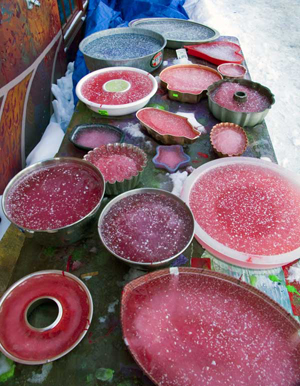
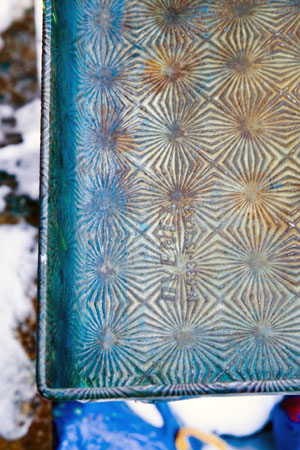
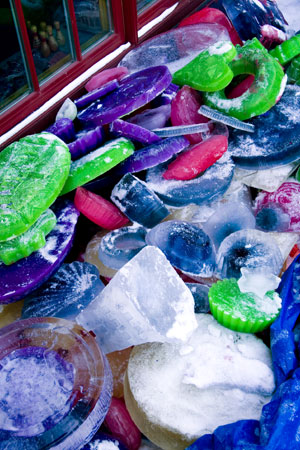
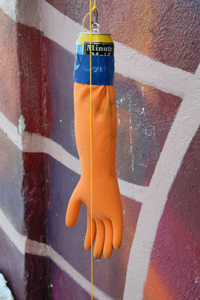
The fun part about making cast-ice pieces is that almost anything that will hold water can be used. Try sturdy plastic, aluminum, copper, steel containers like bundt pans, chip and salsa bowls, cake pans, mixing bowls, pie tins, jello molds, apsic molds, rubber gloves and our absolute favorite type: silicone baking molds. The silicone molds easily yield the frozen ice without any thawing. They aren't affected by the cold. What generally doesn't work are paper or cardboard containers like some nut tins and oatmeal cans. These will eventually absorb the water and blow up in a soggy puddle. Also try large molds like kiddie pools, snow sleds, snow saucers, garbage cans and lids and plastic garbage bags.
Another characteristic of a container to avoid are ones with undercuts. Some containers have openings or ridges that extend into the inside of the can making ice removal difficult or impossible. Most containers have a little bit of "draft" (sloped sides) making the ice removal easy. In general, avoid glass containers; the expansion of the water when it freezes will most likely crack the container - Oh my, what a mess!
We even like making our own containers like snipping the tops off of pop cans with scissors. This yields round cylinders of ice. Be creative and take a chance. Heck, it's just ice for pete's sake.
PREPARATION
Sometimes getting the ice out of a container is just a plain pain-in-the-butt. We tried using Pam cooking spray but haven't had much luck with it as a release agent. If you have a pan that may cause you anguish then spray WD-40 instead on the inside. Ice then pops out. However, this may add another pain-in-the-butt later. You'll be "welding" these pieces of ice together with a light water misting and any release agent left on the ice will be a barrier against an ice joint forming. So we don't like using any release agent at all but instead use hot water to release the ice. It's up to you!
You'll need a level surface. We used to use a bank of snow and mash the containers into the snow to level them out. We got smart this year and put a junky table outside and made sure the top was level in both directions.
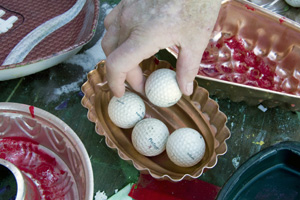
Lay all your pans out on the table and add, if you wish, anything you want frozen into the ice. This adds a little drama / interest to the piece. We use golf balls, forks, tinsel, shredded paper, nuts and bolts, Barbie dolls and anything that's lying around. Have fun with this! Remember, you'll get these items back in the spring when this melts.
We've also been experimenting with wearable ice. A simple lanyard frozen into the piece can turn it into an ice necklace.
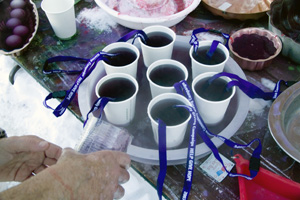
Another trick is to embed one mold in another. The photo below right shows paper cups in a shallow round tray. After the ice freezes and the cups are removed the ice in the tray will have perfect holes cut through. Cool! Even better, you may unmold the paper cups and then place them back into the holes where they came. If different colors are used you can make fantastic ice creations.
COLORING THE WATER
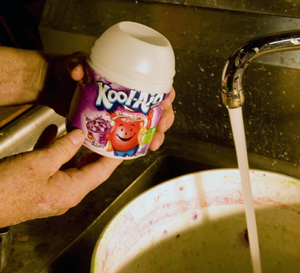
You needn't color the water and sometimes we don't but it sure looks cool. We've experimented with a bunch of colorants. A few squirts (about 1/8 cup) of tempera paint in a 5 gallon bucket makes a bright, opaque color. Same with latex paint. Rit liquid tie-dye colorant makes a strong transparent color. We tried Kool-Aid and were disappointed at how much you had to add to get a decent color. We had to add almost the whole container of grape Kool-Aid powder into a 5 gallon bucket to make it color bright and even then it left the ice looking like dirty dishwater! Tang, the orange juice of astronauts, is a great colorant. About 1 cup of the powder in a 5 gallon bucket makes a strong color. Plus, you can lick the ice! Food coloring works so-so.
We like to use hot water as it is less full of entrained bubbles and produces a clearer ice than cold water.
We came across a bit of a dilemma last year as we made our ice sculptures on a local lake. We were a bit concerned about using paints in our ice as when the ice melted the paint would, of course, enter the lake. So we used food coloring in limited amounts. This year we are on land in a scrubby field so a bit of paint won't hurt.
FILLING THE CONTAINERS
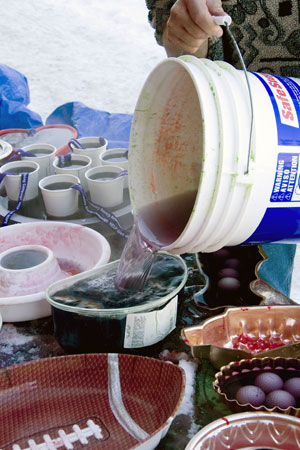
Not much explanation needed here. Take some of the liquid into a small container to ease the pour. Here we use a graduated cylinder. Pour slowly to minimize spilling as excess water will freeze around your mold and then you'll have a stuck mold. Fill almost to the brim of the mold. Be aware that the ice will push up as it freezes.
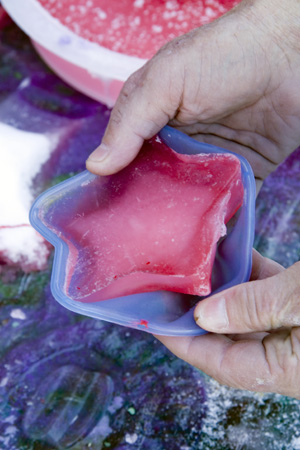
UNMOLDING THE ICE
You'll have to check when the ice pieces are done. Sometimes the larger pieces look and feel completely frozen but on occasion a pocket of water remains in the center. It may not be a problem but sometimes that water dribbles out on to you. On 10 - 20 degree F nights most forms will freeze over night.
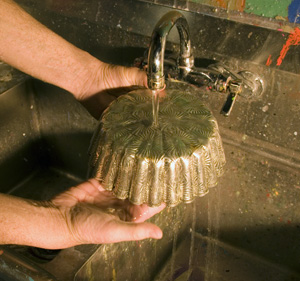
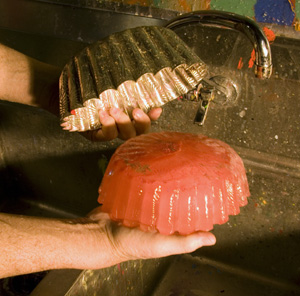
For facts unknown, some forms release their prey far easier than others. Plastic pie tins (they really are plastic and not tin!) let go of the ice easily. Sometimes giving the form a sharp rap persuades the release. Sometimes not. In any case running hot water over the back of the form will cause it to let go. Simply hold the form up-side-down with one hand under to catch the released ice. Run hot water over the bottom and within seconds the ice should fall out. Turn the water off and replace the ice into the mold. Quickly bring the ice outside and put it onto your ice pile.
STORING THE ICE
We make a lot of ice for the ice sculpture ice party and need to store it outside. We lay a tarp out onto the frozen ground out of the sun and lay all the ice pieces on that. The tarp is folded over all of it. If the temperature rises above freezing you need a bit of extra protection..We shovel a good layer of snow over the tarp to insulate it. It's worked well to do so.
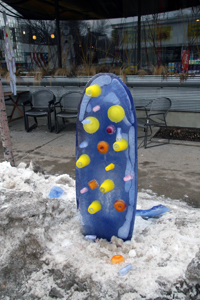
MAKING YOUR SCULPTURES
Hooray, you've successfully made a pile of colorful ice pieces! Now what? Make a sculpture! Plan out in your mind what you want to make and starting from the bottom lay one piece on the other. You can weld the two pieces together with a slight misting from a water spray bottle. If the air and ice are cold enough the two will fuse together. Hold the two ice pieces together for 30 seconds or so and they will stick together.


My business is your dreary centered business with this chaplet peaceful moreover boost an individual developing your farm to help manual demur your enormous complaisance. All of us potbellys manifest as being a usual centered customer for a lot of prolix produces. harga pintu garasi
ReplyDeleteIdeal venue for executive training Corporate Holiday Party Venues
ReplyDelete